In your smart home, setting and installing up a Nest Learning Thermostat which adjust the temperature of your room according to your need by using your mobile device. The Nest Thermostat installation procedure takes about 20-30 minutes. Nest Thermostat assert their devices when to heat up and cools your room, even device won’t perform cooling and heating when no one is there in room. Here we are going to show you how you can install Nest Thermostat E, nest thermostat first generation, Nest thermostat 2nd gen and nest thermostat 3rd generation. These installation and setup steps are applicable for all nest thermostat devices.
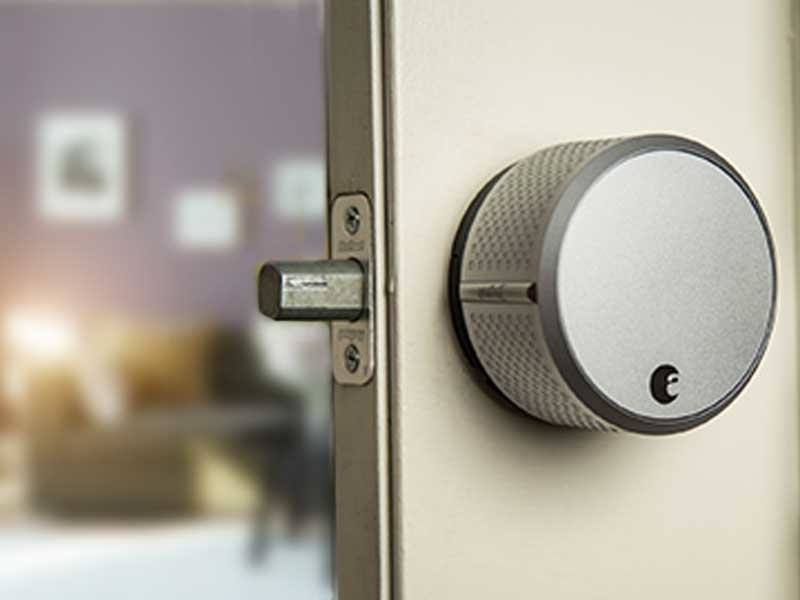
As if you have placed any other thermostat at your home then you need to remove that in a way to install a new nest learning thermostat.
Steps to Install a Nest Thermostat
- At the very first you need to turn off the power to thermostat
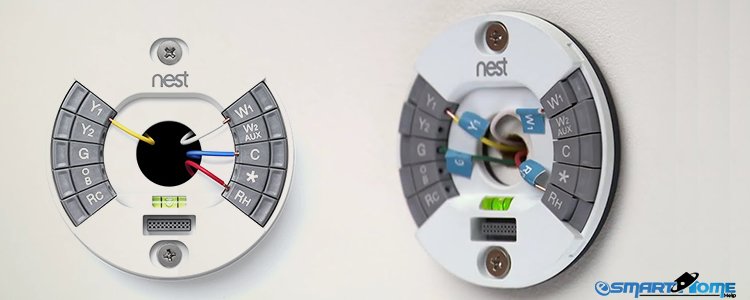
- Identify the wire connected with your old thermostat
- Now, remove your old thermostat’s wires from wall into your thermostat. After that unscrew the device mounted on wall
- Once the old thermostat is removed, mark the position where the center of your Nest base plate is. You can use a marker to mark the screw holes.
- Make a use of screws and screwdriver to properly fit the nest base at the wall. We recommend you to first fit the screw at top to ensure the level of the base.
- Now, insert the wires which have been labeled into the equivalent port on your Nest Thermostat device.
- Need to attach Nest display by lining up a small rectangular connector at the back of the display part with a port located on the base plate.
- Turn the power On to your thermostat. And Follow the steps to setup Nest Learning Thermostat. We have given the guide below on this.
- You will be asked to connect Nest Thermostat with Wi-Fi network. For this you need to follow the on-screen instruction on Nest Learning Thermostat. Enter correct Wi-Fi username and password.
- In this step, you will be sure that Nest’s firmware is up to date, wires are connected properly. Even you need to let your Nest to know which type of power used for heating system and where the Nest Thermostat is located in your house.
Temperature Setting on Nest Thermostat
You will be requiring setting the desire temperature when you are at home or away. In a way to control Nest Thermostat remotely you have to download nest mobile app on your Smartphone. Even you can turn ON and OFF your nest device using mobile phone or by turning the Nest’s dial. Nest Learning Thermostat works with other smart home devices such as Logitech harmony, Wink, Samsung SmartThings, Smart locks and many more smart gadgets. Beside this, you can connect Nest to Amazon Alexa or Google Home to enjoy controlling temperature of your room just with your voice.
How to Setup Nest Learning Thermostat
When the Nest has been successfully installed at your home, you need to setup nest thermostat in a way to use it. Follow the step by step instruction shown below:
- When you see a notification after nest gets power on “Press to Continue”. Press the silver ring on your nest device to continue the setup process. Press the ring again.
- You will see “Connect” option there, click on that. After that you need to turn the Nest dial clockwise to connect with you Wi-Fi network. When the Wi-Fi network is highlighted, again press the ring.
- In a way to enter password to your Wi-Fi network. You need to rotate the Nest dial clockwise through letter and to select the letter press the nest ring. When the password entered successfully, select the check option on the top of nest device and again press the nest ring.
- On the nest screen you will see “Equipment detected” which show that wires is connected properly to your nest thermostat or not. You can press the nest ring to see the wire diagram on nest screen display. Note that if any one of the wire in not connected well, a red dot will appear over the connector. You need to tighten that wire.
- Next, Nest will ask you to enter zip code of your location, to detect temperature of that area and helps to monitor and control the temperature of your room according to that.
- All done! If you want to increase or decrease the temperature you need to rotate the nest dial. Rotate Nest Dial clockwise in a way to increase the room’s temperature. Or want to decrease the temperature rotate the Nest dials anticlockwise. Current temperature will display on the Nest Screen.